


There are different reasons why proxies are used. On the one hand, they disguise the user’s own IP address and thus offer a certain degree of anonymity. On the other hand, they can be used to change the user’s geographical location to bypass geo-blocking of websites.
Faster network speeds, web data scraping, competitive research, and the use of multiple social media accounts are some other reasons for using proxies.
Below is a step-by-step guide on how to install proxies on Chrome browser.
Steps to Install Proxies in Chrome Browser
Attention! Google Chrome lacks its own network settings and it uses system network settings. Enabling, changing, or disabling the use of proxies will therefore affect other browsers (e.g. Edge and Opera) or other programs that also use system network settings.
A Short Description of Proxy Installation in Google Chrome
To install a proxy in Google Chrome, follow these steps:
- Open Google Chrome and go to “Settings.”
- Scroll down to “Advanced” and click it.
- Click “System” and then click “Open your computer’s proxy settings.“
This will launch the Network & Internet dialog box. Depending on your operating system, the next step will vary:
-
-
- For Windows, click on “LAN settings.“
- For Mac, click on “Proxies” and then select “Web Proxy (HTTP).“
- For Linux, click on “Network Proxy” and then select “Manual.”
-
- Enter the port number of the proxy in the Port section. If you’re using our proxy service, the port number would be 8085 for HTTP proxies.
- Click “Save” to apply the changes.
That’s it! Your Google Chrome browser is now configured to use a proxy.
If this description of the installation is not enough, read the more detailed instructions below.
HTTP/HTTPS Proxy Installation
HTTP proxies are mainly used for browsing the Internet and are the most commonly used type of proxy. They work in browsers and on some other programs that support the HTTP protocol.
HTTPS proxies differ from HTTP in that they allow the transfer of all data between the user and the web server in encrypted form.
For more information on this topic read in the article HTTP and HTTPS proxies.
To configure the browser for use with an HTTP/HTTPS proxy, do the following:
- Open the browser settings menu by clicking the three dots … in the upper right corner of the screen.
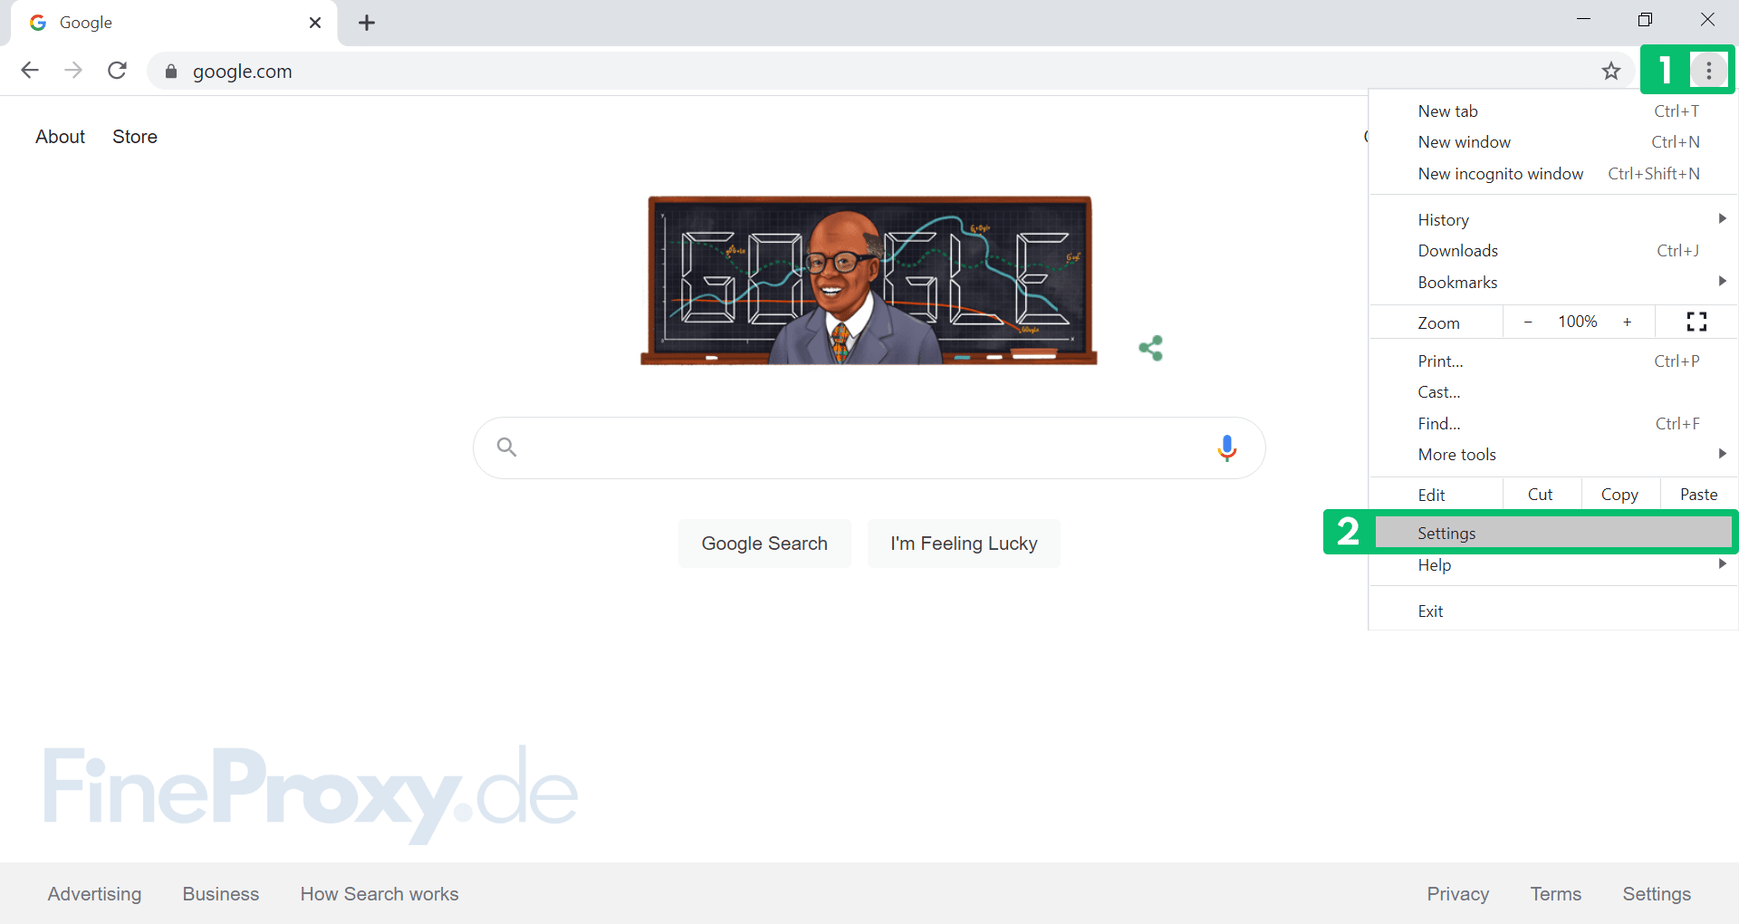
- Select “Settings” from the menu that appears.
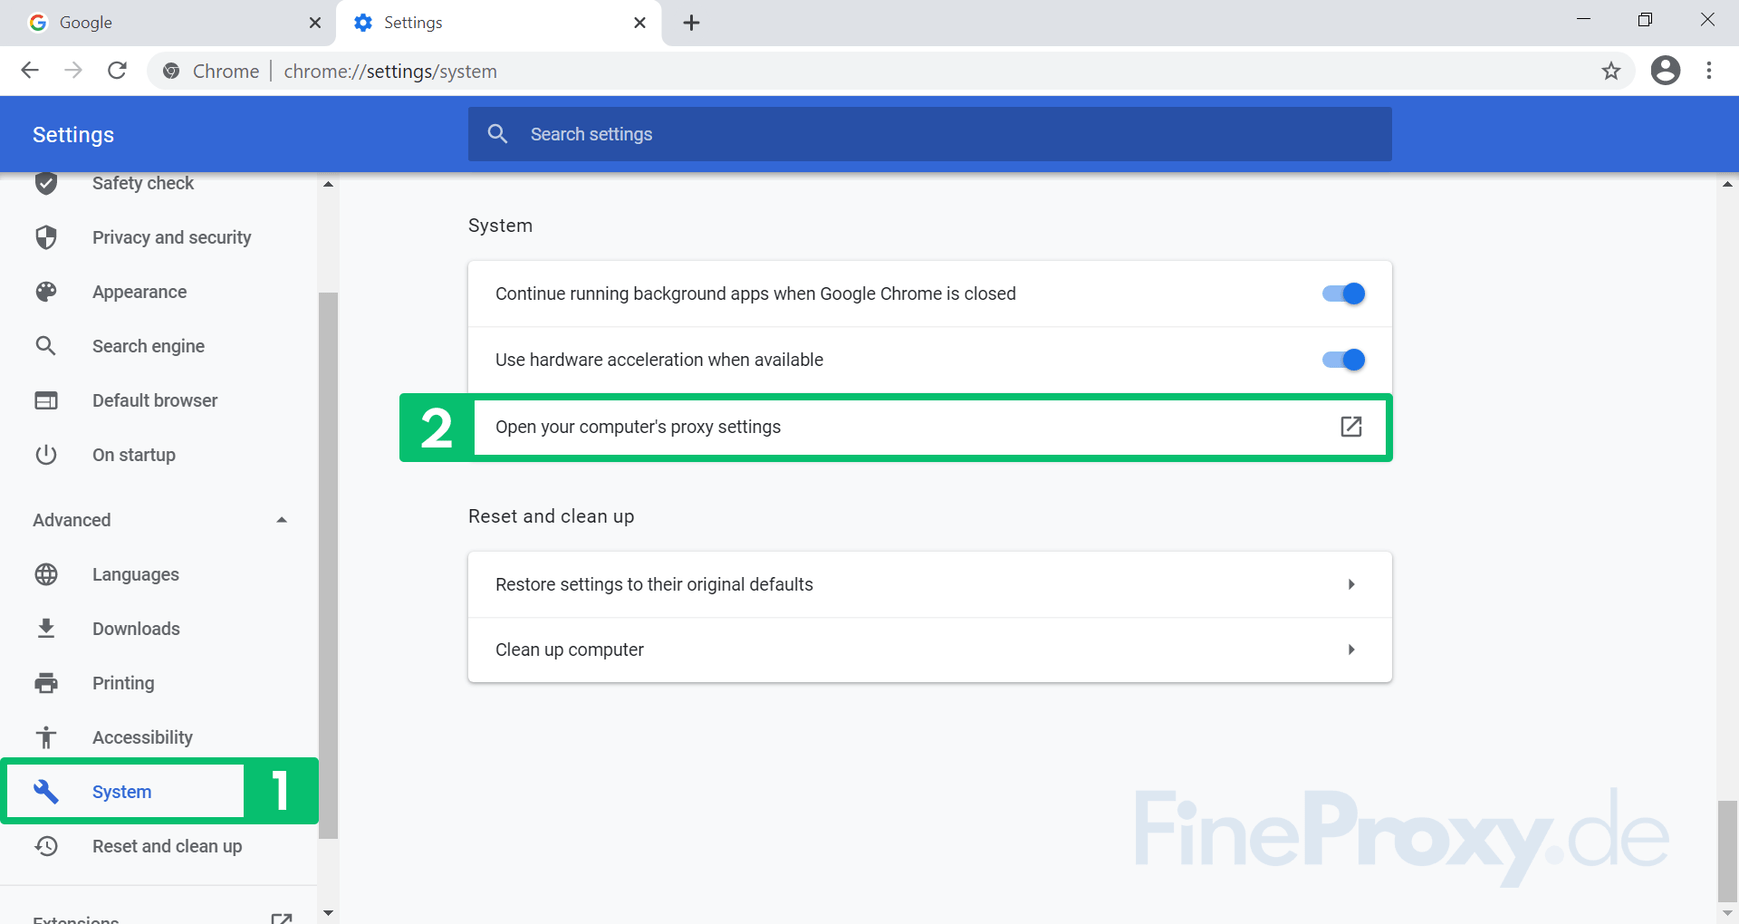
- On the left side of the menu, click on “Advanced“, then select “System” from the drop-down menu, and then open the Windows system settings by clicking on “Open your computer’s proxy settings“.

- In the displayed Windows System Settings screen, in the “Proxy” section and in the “Manual proxy setup” subsection, move the “Use a proxy server” slider to the “On” position.
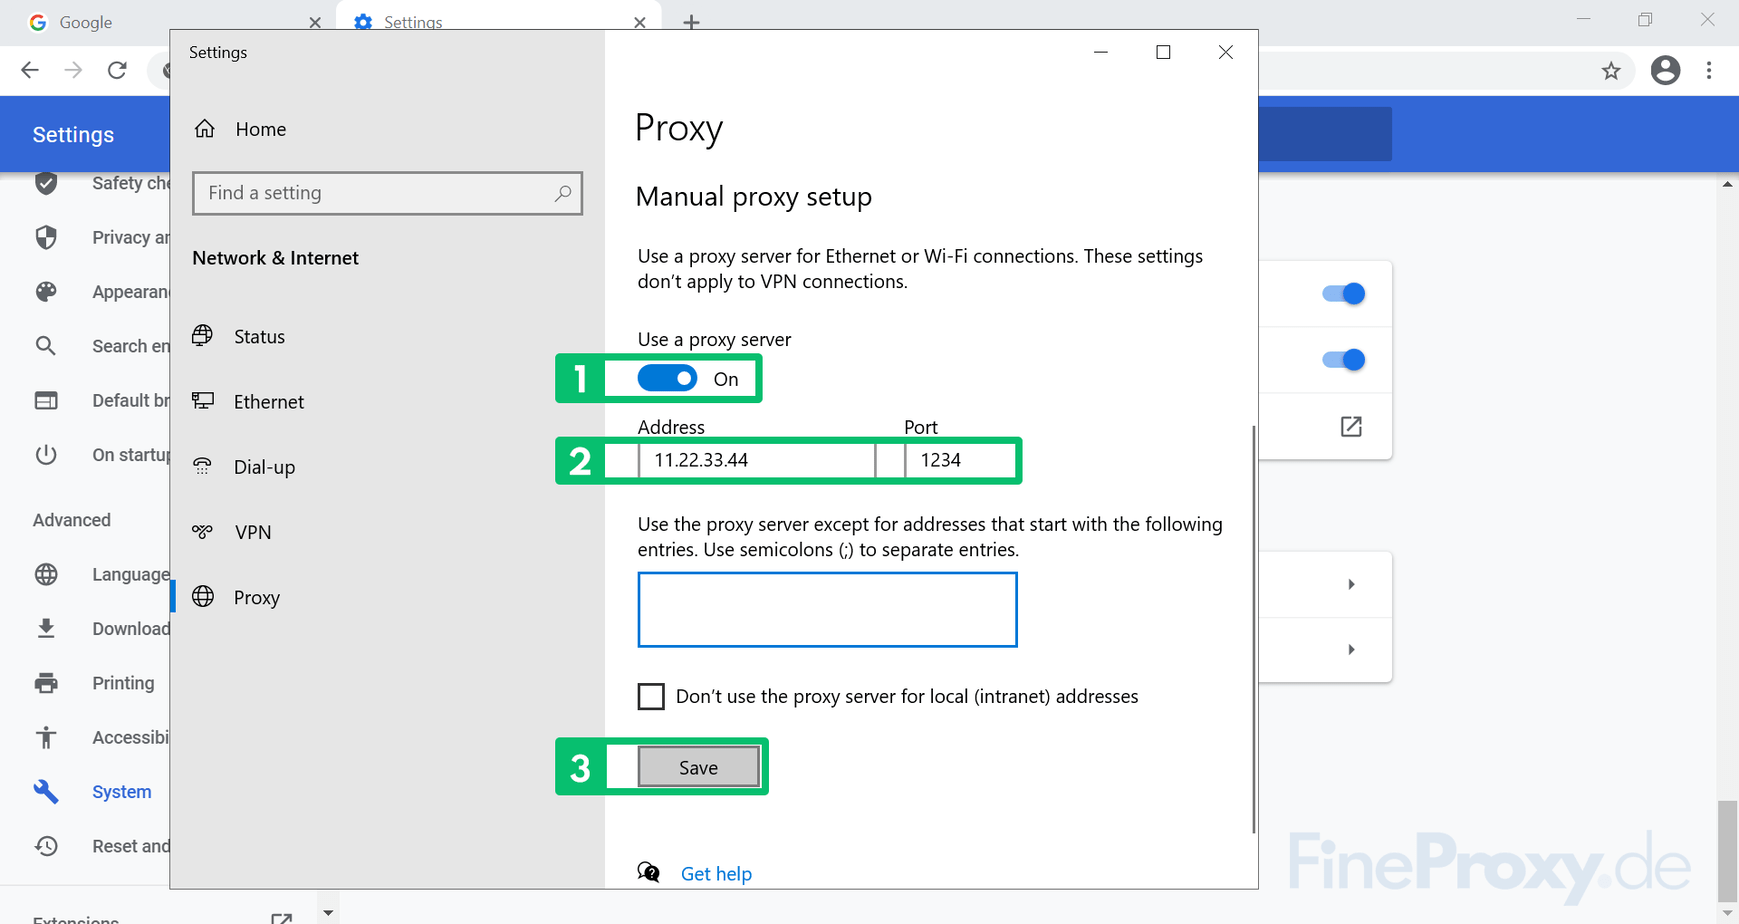
In the “Address” and “Port” fields, enter the data received from the proxy provider, i.e. proxy IP address and port. Then save the changes by clicking the “Save” button.
You can check if the IP changes have taken effect by going to the IP Address Discovery page.
Installing SOCKS Proxies in Google Chrome
The Socket Secure or SOCKS proxy is an application-level proxy suitable for specific use cases such as censorship evasion, access to restricted websites, torrent anonymization, in different messengers like Telegram, etc.
SOCKS proxies can be also used with browsers by either installing them as an extension or configuring the browser’s settings to use a SOCKS proxy.
With a SOCKS proxy, all of the browser’s traffic is channeled through a proxy server, which then forwards the information to the intended destination. For more detailed information read the article What are SOCKS Proxies.
Unlike Firefox and Tor browsers, the Chrome browser cannot fully work with the SOCKS protocol. Therefore, if you need to use SOCKS proxy with the Chrome browser, we recommend using the FoxyProxy add-on. FoxyProxy is one of the most popular browser extension for Google Chrome that allows users to change their default proxy settings with ease. The extension minimizes the process of configuring a computer to talk through a proxy server and provides a set of simplified, browser-based controls to manage proxy settings.
Disabling Proxies in Chrome
To completely disable proxies in Chrome, you need to move the slider located opposite the “Use a proxy server” text to the “Off” position.
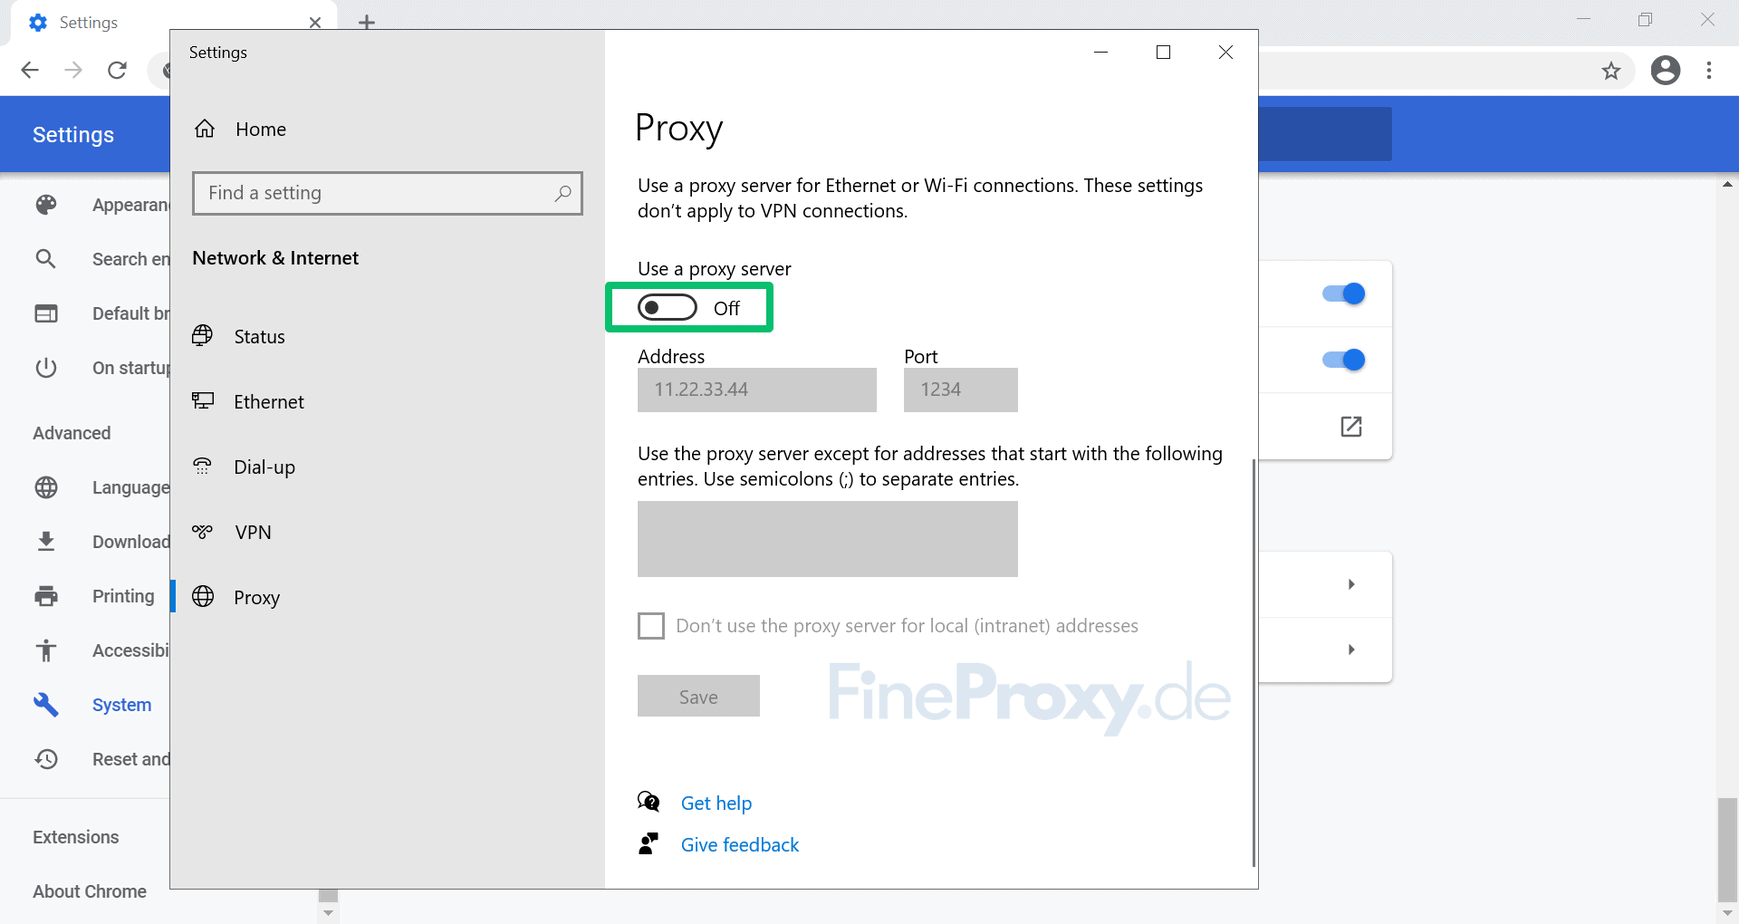
You can check if the IP changes have taken effect by going to the IP Address Discovery page.
From this point on, all connections to websites will be made from your real IP address, without using a proxy server.